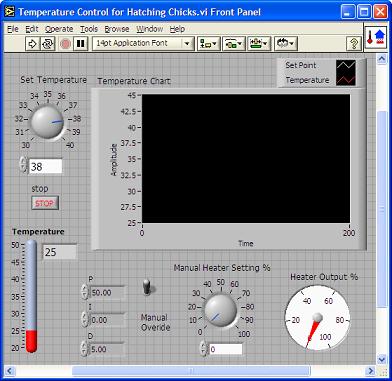
LabVIEW Front Panel
LabVIEW Block Diagram
- The VI first configures the EMANT300 to use the PWM output rather than the counter.
- The sub VI Temp Control Thermistor.VI returns the temperature in Celsius as measured by the thermistor.
- In normal operation, this measured temperature value is then compared with the set value to generate the PID output.
- The PID output is between 0 to 100% and is used to drive the PWM output.
- The VI also allows you to control the heater output manually by setting the manual override. Note that setting the PWM output to 0 turns off the heater and 100 turns on the heater completely.
- One way to check the your circuit is to observe the temperature when you change the PWM output. The temperature should change. If you have connected the optional LED, the LED intensity should also change as you adjust the heater output.
- As the load resistor is not designed to be a heating element, you may not be able to heat up the area around the thermistor to above 38 C (this will depend on the environment of the room you are working in).
- Click the Run
 button to run the VI.
- Switch the Manual Override down. This will set the heater output to manual override. When you change the manual heater setting dial, the gauge output and the LED intensity will change. If you observe the LED intensity changing,your circuit is connected OK.
- Set the PWM to 0. Call the temperature measured Tamb. Set the PWM to 100. Call the temperature measured Tmax.
- Observe the temperature reading, is it giving the correct values? If yes, then you are ready to set the temperature and put the heater under PID Control. Set the control temperature between Tamb and Tmax that you measured earlier. Use the P, I and D values as shown in the front panel.
- You can experiment with different set points as well as different PID values. To understand how to set the PID values is outside the scope of this exercise but information on PID tuning is readily available from the web or textbooks on control.
- Press
 to stop the VI.